|
USER-SPECIFIC CUSTOMIZATIONS STILL NEEDED
Two areas exist where the user may need to further customize their
Photobars CS installation: The toolbars themselves and the button categories
found under the Customize Toolbars dialog. The easiest way to complete the
user-specific customization is to perform it upon the button categories and
then use the updated buttons to replace those existing on the toolbars where
the same buttons have been used. The button categories and related toolbars
where user-specific customization should be considered are:
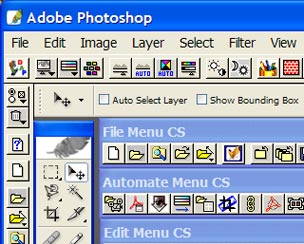
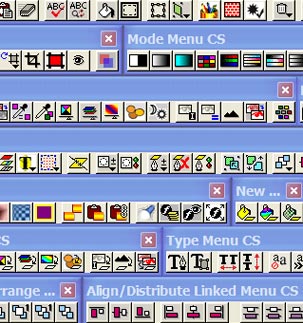
- Import Menu CS – The button definitions for this category and
toolbar vary for each user due to the different import device
configurations that may exist for a particular computer. That is, if you
have more than one scanner, digital camera, etc., that can be used for
acquiring images, then the Import Menu will change in size and cause a
shift in values which define each button. Therefore, the user must update
these buttons for their own particular situation. A few extra button icons
have already been provided to facilitate this.
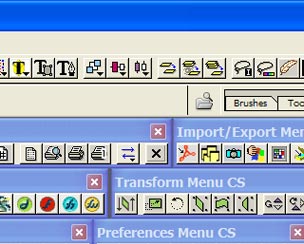
- Export Menu CS – Similar to the Import Menu, buttons for items
on the Export menu may need to be updated or created if any software has
been installed by the user which affects the range of Export options
available.
- Jump To Menu CS – This menu may be used to invoke other
graphics and HTML-editing applications, but those applications vary by
user. As such, if a user wants to create any application-specific button
for a Jump To menu item, they must create a new button or update an
existing one accordingly. Note that use of any Jump To menu item requires
that a shortcut to the application has already been created by the user
and placed into the appropriate Jump To directory under the <install
path>\Adobe\Photoshop CS\Helpers directory. Extra button icons for
several Adobe and Macromedia applications have already been provided to
facilitate this.
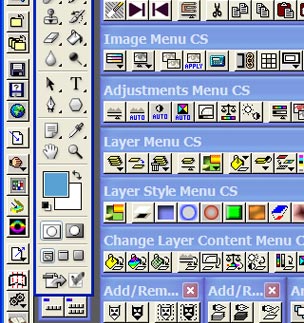
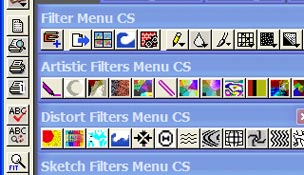
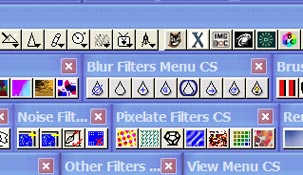
- Filter Menu CS – The range of third-party filters (plug-ins)
for Photoshop is very broad, and which ones are installed on a given
user’s computer is even broader. The Filter Menu CS category and toolbar
provide a sample collection of button icons for various plug-ins available
for Photoshop but these may not suite a user’s particular needs. The user
can delete them as desired from the toolbar and/or redefine them, as well
as create their own buttons for their unique assortment of plug-ins. It
may even be best just to not have any buttons for third-party plug-ins if
you frequently install or uninstall plug-ins or use a plug-in manager,
since any such changes would affect the menu values mapped to a given
button.
- Automate Menu CS and Scripts Menu CS – Both of
these toolbars and button categories are again impacted by unique plug-ins
installed or scripts created by the user. As such, any items added to the
menus will affect the mapping of currently defined buttons and thus they
will require an update if the user desired a stand-alone button for any
given menu item. The suggestion here is to forego user of either toolbar
although they have been provided for completeness, and just use the
Automate Menu button and Scripts Menu button of the File Menu CS toolbar.
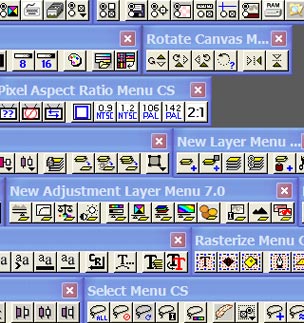
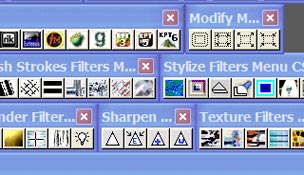
- Render Menu CS – Photoshop 7 provided the 3D Transform and
Texture Fill filters as items under the Filters > Render submenu. For
Photoshop CS, these two filters are no longer in the default installation
but they are provided on the Installation CD in the Goodies\Optional
Plug-Ins\Filters folder. If those two filters are installed by the
user and they wish to build up the Render Menu CS toolbar to be inclusive
of the two added filters, buttons are available for that purpose in the
Render Menu CS category.
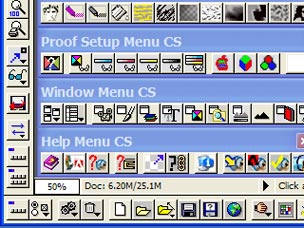
- Help Menu CS / Help2 Menu CS – The toolbar and category
provided for the Help Menu do not reflect all items of that menu in
Photoshop CS. This decision was taken based upon the simple fact that it
would be of little added advantage over simply accessing the Help menu
directly. However, if any help-specific buttons are desired here, it is up
to the user to create them accordingly. The Help menu toolbar is provided
for completeness but it should also be noted that if the Extensis menu
fails to appear when Photoshop CS is started up, this will skew the button
definitions such that they become incorrect; in this case, the Help2 Menu
CS toolbar should be used instead. Likewise, if the Extensis menu is
present and the Help2 Menu CS toolbar is enabled, it should be disabled in
favor of enabling the Help Menu CS toolbar.
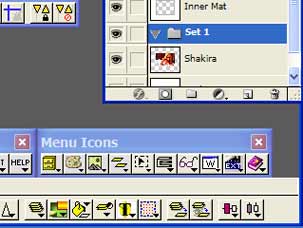
EDITING TOOLBAR BUTTONS
I've received a few questions about how to edit the toolbar buttons.
The following is a brief description:
With the toolbar floating and the Customize Toolbars menu open, open the
Icon Button Editor by a CTRL-ALT-DOUBLECLICK on the button icon of interest. Revise the
menu command type appropriate to the command's new position in the Photoshop menu
structure. Menus number left to right, starting with the FILE menu as menu 0. Menu items
number top to bottom, with the topmost item/submenu being numbered 0. Separator bars are
also counted as an item. When creating a menu button, the item number is -1 and when
creating a single item button, the submenu is -1.
EXAMPLE: CUT command = Menu 1, Submenu -1, Item 6
EXAMPLE: ROTATE CANVAS submenu = Menu 2, Submenu 10, Item -1
Currently displayed toolbars can be directly edited without going through
the Customize Toolbars dialog, by CTRL-ALT-DOUBLECLICKING directly on the toolbar
button. Note that the toolbar must be floating for this to work. Docked
toolbars cannot be edited. Also, to shift buttons around on toolbars, just hold down
ALT while selecting and dragging the button icon to the desired location. Dragging
it off the toolbar will delete the button. Dragging an icon just a few pixels away
from another will create a space between them.
Note that if you edit a button from one of the Customize Toolbars
categories and that button has already been used on a toolbar, the new edits are not
mapped to the toolbar. Instead, it will be necessary to drag the revised button onto
the toolbar and to delete the previously used button. Alternatively, you can
directly edit the button on the toolbar in the same manner as that edited in the Customize
Toolbars category. Just Ctrl-Alt-Doubleclick on the toolbar button itself to open
the Icon Button Editor.
To make a new icon graphic, create an image that is 19 pixels wide by 17
pixels high, not exceeding 16 colors in depth. Copy that image to place it on the
clipboard and then enter the Icon Button Editor. Click on the button icon in the
Icon Button Editor to paste the clipboard image as the new icon. When using
Photoshop to edit a new icon graphic, I commonly saw the graphic get corrupted in the
paste, as if it were shifted to the right by about 5 pixels and with that 5 pixel area
filled in white. However, by saving the graphic as a 4-bit BMP file, opening the
file in Paint, selecting and copying the graphic, and then performing a paste into the
Icon Button Editor, I was successful in creating new icons.
For the existing toolbars I've created, these may certainly be further
customized by the user as desired, by adding and/or deleting buttons. However, a
button on one toolbar cannot be dragged onto another. So, the toolbars cannot be
used to build additional toolbars; this requires using drag and drop of icons from the
Customize Toolbars categories. I hope that makes sense.

PHOTOBARS CS INSTALLATION
QUESTIONS?? First, please read the list of
Limitations
INSTALLATION
The PhotoBars CS supplement is easily installed to supplement an existing
installation of PhotoTools 3.0.6. These instructions assume a default
installation path of C:\Program Files\Adobe\Photoshop CS\Plug-ins
which should be changed if the user defined another installation path for
Photoshop CS.
CAUTION: While Photoshop supports use of a secondary plug-in path
for third-party filters, both PhotoTools and the PhotoBars supplement
should be installed directly to the primary plug-ins location so that all
support files are placed as required throughout the Photoshop CS directory
structure.
- If other Extensis plug-ins are also being installed, please install
them first, followed last by PhotoTools 3.0.6. PhotoTools 3.0.6 may depend
upon a few older versions of common files that are shared with other
Extensis plug-ins. If those files are overwritten, problems may arise in
using PhotoTools. However, the reverse is also true…the installation of
Phototools last may affect other Extensis plug-ins although this has not
been observed using demo versions of several Extensis plug-ins to test for
such problems.
- If any attempt to re-use a prior installation of PhotoTools and
PhotoBars has been done by copying the files from another Photoshop
installation into Photoshop CS, delete or move those files out and and
start fresh. Any custom toolbars created by the user may be restored later
to see if they work, but only those which do not overwrite the existing
files that will be installed by PhotoBars CS.
- Install PhotoTools 3.0.6 to the Photoshop CS installation path.
- Ensure the Photobars CS self-extractor has been renamed from
ps8bars.dap to ps8bars.exe and then execute the file to extract
the ps8bars folder.
- Open the ps8bars folder, Copy the Extensis folder
to C:\Program Files\Adobe\Photoshop CS\Plug-ins, and OK any prompt
to overwrite existing files. The ps8bars\Extensis folder contains only
those files needed by PhotoBars and will not affect other PhotoTools
components.
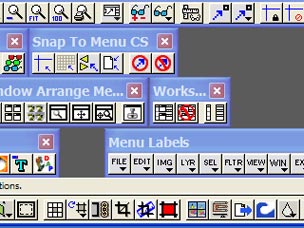
- Open Photoshop CS and verify that 3 toolbars appear, with one docked
at the top edge of the window and one at the left edge, with a third
two-button toolbar undocked in the workspace. Also confirm the Extensis
menu is present; if not, refer to the problems discussed below. Depending
upon the monitor display settings the docked toolbars may be too large and
may be further customized or disabled by the user as desired.
CREATING A PHOTOBARS BACKUP
Saving a backup copy of the PhotoBars CS by burning a copy of the files
to a CD-R is discouraged. The preferred approach is to burn the original
self-extracting zip file and password to a CD or, recompress the extracted
files as a new zip file without a password, and burn that to a CD. The
same approach is also recommended for making a backup of the user’s own
customizations. Use of a zip file in this manner preserves the file
attributes so that when the files are extracted to a hard drive, they are
ready for error-free use. Otherwise, if the extracted files are burned to
a CD and later restored to a hard drive, the user must ensure the
read-only attribute is cleared for all files so as to prevent errors in
the use of PhotoBars.
Limitations
- PhotoBars CS is designed for use with Photoshop CS only. Use with any
other version of Photoshop will find many of the buttons to be incorrectly
defined.
- The PhotoBars CS supplement is not supported in any way by Extensis,
manufacturer of the PhotoTools 3.0.6 plug-in suite. As such, Extensis
cannot be held liable for any problems which use of this supplement may
introduce. This supplement requires the installation of PhotoTools 3.0.6
which is available through the Extensis website at http://www.extensis.com.
Please note also that Extensis updated PhotoTools 3.0.6 for use with
Photoshop 7 but they did not roll the version number. That is, there is a
“old” and a “new” PhotoTools 3.0.6; so long as you have downloaded the
version that is available as of this writing, you should have the “new”
version.
- Extensis has discontinued PhotoTools and will not be providing an
update for Photoshop CS. While this does not appear to be a major problem
where PhotoBars CS is concerned, a randomly occurring problem has been
observed wherein the Extensis menu does not appear in the primary menu bar
when Photoshop CS has completed initialization. If no toolbars are enabled
and displayed in the Photoshop workspace, then the PhotoBars can ONLY be
accessed via the Extensis menu. For this reason, PhotoBars CS is delivered
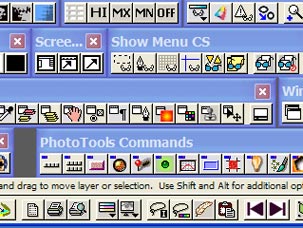
with two toolbars (“PSCS Editing Favorites” and “PSCS File Manager”)
enabled and docked to the top and left edges of the Photoshop CS window,
and a third two-button toolbar (the “Starter CS” toolbar) that is floating
in the workspace. Each of these toolbars provides the Edit Toolbars
button, which provides an alternative way to enable other PhotoBars
toolbars in the event that the Extensis menu is not available.
CAUTION: The user should ALWAYS leave at least one toolbar
enabled that provides, at a minimum, the Edit Toolbars button from the
PhotoTools button category. Otherwise, if the Extensis menu is lost (see
Problems list) and no toolbars are active, it becomes impossible to
access the toolbars within Photoshop, requiring that the supplement be
reinstalled.
- Use of the Icon Button Editor to create toolbar buttons for keystroke
commands does not work. This problem seems inherent to PhotoTools
and is present back to PhotoTools 3.0.3 for Photoshop 5.5. There is
no solution for this problem as Extensis never provided one.
- The Custom Buttons category can only store up to 44 new buttons.
I can't imagine this being a problem for anyone however, as the need for
so many custom buttons is unlikely.
PROBLEMS?
If you encounter problems in the use of PhotoBars CS, be advised that
just as this supplement required no software modifications to provide, I
have no knowledge of how to modify the software for any problems other than
incorrect mapping of the buttons. As such, this supplement is provided
without warranty for how it might operate on your PC. However, I will do all
that I can to assist a user of the PhotoBars supplement with questions or
problems that arise, hopeful that we can find a solution but not promising
one. If your problem is not addressed and correctable per the following,
please feel free to contact me.
- OOPS! I CLOSED ALL TOOLBARS AND I DON’T HAVE THE EXTENSIS MENU TO
RE-OPEN THEM!
To remedy this situation, the quickest solution is to shut down Photoshop
CS, and then copy the file Starter_.bar from the PhotoBars\category
directory up one level to the PhotoBars directory. This will be
the least intrusive repair and will not affect any existing
user-customized toolbars. Then, reopen Photoshop CS and the Starter CS
toolbar should be found undocked in the Photoshop workspace. From that
toolbar, the Edit Toolbar button can be used to activate any other
toolbars desired. In lieu of this approach, the user may also reinstall
the original PhotoBars CS supplement files.
- FOR A MISSING EXTENSIS MENU (commonly observed on the author’s
system):
It appears that a full uninstall and reinstall of PhotoTools is required.
Before doing this, please copy the PhotoBars directory to a backup
location so that it can be restored when the reinstall of PhotoTools is
complete. This will preserve user customizations. Note that the Extensis
menu may not be required unless used by other Extensis plug-ins, most of
which appear to also use the Filter menu with the exception of pxl
SmartScale. If you don’t care about the missing menu and just want to
enable toolbars that you’ve accidentally closed, refer to the previous
problem and solution.
- THE EXTENSIS MENU IS PRESENT, BUT THE TOOLBARS AREN’T SHOWING UP!
At the time of release of PhotoBars CS, I was only aware of one user who
had seen this problem. This is suspected to be some peculiar software
problem, perhaps a compatibility issue between PhotoTools 3.0.6 and
Photoshop CS or a software conflict with other Extensis plug-ins that may
share some common files with PhotoTools. The only suggestion is to try
uninstalling PhotoTools 3.0.6 and reinstall them, after first saving a
backup copy of the PhotoBars directory.
- “EXTENSIS ERROR #xx” REPORTED!
The most likely cause of such errors is that the read-only attribute is
set on one or more of the files in the PhotoBars directory. To
resolve the problem, select all files in the directory, open the file
Properties sheet, and uncheck the read-only attribute. The check box may
show a color-filled state with no checkmark, but this indicates that at
least one file as the read-only attribute set. Just click the check box
until it shows neither a check nor a colored fill.
Thank you for your interest in the PhotoBars
CS Supplement! Please
contact me if you have any questions or problems.
AMBRESS

|